
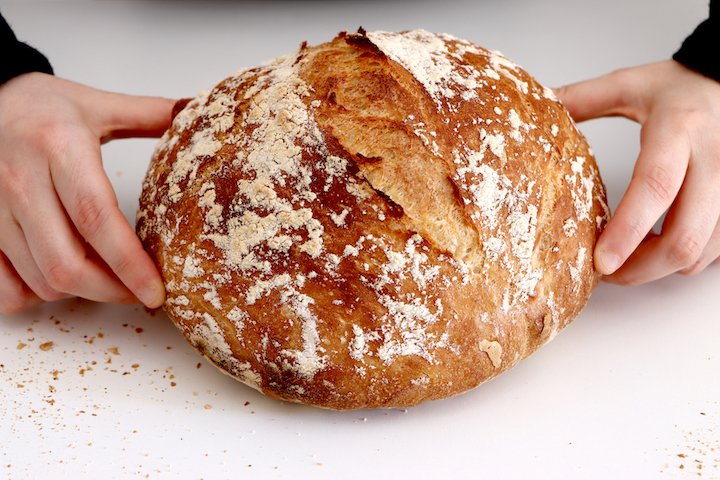
Easy Italian No-Knead Bread Recipe
Emma Fontanella’s Easy Italian No-Knead Bread In A Dutch Oven—Pane dei Castelli Romani
About My Easy Italian No-Knead Bread In A Dutch Oven
For me, kneadless bread recipes and bread recipes designed for a Dutch oven really are the easiest of easy bread recipes. This recipe combines both! It produces a delicious, rustic loaf with a crispy crunchy crust and a soft, white interior. With this method, you can make fresh homemade bread from scratch every day, even if you’re out at work all day.
In Italy, this bread is called pane casereccio dei Castelli Romani.. Around Rome, every family has their own recipe, and this is mine. If you’re a fan of ciabatta, I think you’ll love it!
If you’ve never made bread before, this is a great place to start! If you’re a more experienced baker, this traditional Italian bread is a great one to add to your repertoire. For more advanced bakers, I’ve included some interesting discussion about proofing (and over proofing) doughs and crumb structure, and how dark to take the color of the crust.
This recipe can be found in my new cookbook, Simple Pleasures. In the book, you’ll find many more great bread recipes, including no-oven English muffins, amazing dinner rolls, party sharing breads, and even my mom’s special focaccia.
What is pane dei Castelli?
This is probably the most famous Italian bread you’ve never heard of! It’s been made for hundreds of years on the outskirts of Rome, in a region called the Roman Castles (Castelli Romani, in Italian). While the name of this bread isn’t so well-known outside Italy, the dishes it’s used in certainly are!
I’m sure you’ve heard of “bruschetta”! Well, in Rome, pane dei Castelli is the bread chosen by top chefs to make that. If you’re a foodie, you might have heard of the Italian bread salad, “panzanella”. Yep, you guessed it—the bread of choice for the Roman version of this dish is this one.
Bread that’s this delicious doesn’t need butter or oil—it’s incredible just by itself. Enjoy the contrast between the crispy crust and soft inside as you eat it. Having said that, it’s a versatile bread, and I’ve given you several suggestions for how to use it in the section below, “How can I use rustic bread like pane dei Castelli?“
How can I use rustic bread like pane dei Castelli Romani?
Sandwiches. We’re so used to industrially produced loaves, that we think sandwich bread has to be square! It’s not true—pane dei Castelli makes a great sandwich bread! If you like pulled pork, it’s absolutely perfect for a pulled pork sandwich (make sure to include the crispy bits)!
It works because the bread is just robust enough to old onto the warm meat and its juices without falling apart. In Rome, we use porchetta. The great thing about using porchetta is that no other ingredients are needed for the sandwich because the porchetta already has all the seasonings you need.
Don’t think you can only use pulled pork though. This is a really versatile sandwich bread.
Bruschetta. In Rome, this bread is widely regarded as the bread of choice for bruschetta. The simplest is bruschetta aglio e olio (meaning with garlic and oil). Toast slices of the bread, rub with raw garlic, and brush/drizzle with really good extra virgin olive oil. Season with salt. It’s delicious just like that; but feel free to use whatever additional toppings you like—cold cuts, cheeses, cured meats, buffalo mozzarella, and tomatoes are all fantastic!
Grilled Cheese. At the end of this recipe, I show you how to make a truly incredible Italian grilled cheese sandwich. It’s super crunchy, with fantastic melty cheese. You have to try it!

An Italian grilled cheese made with the pane dei Castelli Romani (recipe at the end)
Snacks. I also love to use this bread for a quick snack called pane e pomodoro fresco. That sounds fancy, but it really isn’t. It just means - bread and fresh tomato in Italian. You’ll also find similar versions of this snack throughout Spain. It’s so simple, you won’t believe how utterly delicious it is.
All you do is cut slices of your bread. If it’s still very fresh and soft, you can toast or grill it lightly; but if it’s a day or two old, you can use it as it is. Rub the bread with the face of a garlic clove cut in half. Then cut a tomato in half, and rub the cut face of the tomato all over the bread, so the bread is covered all over with tomato. Season it to your liking with salt and drizzle with a little extra virgin olive oil.
Dipping. This bread is also delicious for dipping in a bowl of ragu or other sauce. If you’re making a bolognese, try serving a bowl of it with some of this bread on the side. You might not want to eat it with pasta ever again!
Panzanella. One of the best things about this style of homemade bread is that you can use it even when it’s gone stale (unlike industrial bread). In the Roman version of the popular Italian bread salad, panzanella, the traditional bread to use is, in fact, this one—pane dei Castelli Romani. Panzanella is the perfect way to use up left-over bread that’s gone a little stale.
About the two methods of making this bread
I’m going to show you two, easy, ways to make this no knead dough: zero effort; and stretch-and-fold.
The first is as close to zero effort as you can get in making bread (less than five minutes of total hands on time). It’s also the most authentic method—it’s the way Italian nonnas have been making this bread for hundreds of years! This is a great option if you have to be out of the house all day e.g., at work, and want fresh bread with your dinner in the evening.
The second method only requires a couple more minutes of hands on time, but you have to be around for a couple of hours during the day. For this method, you’ll be using the stretch and fold method (you might know this from my Big Bubble Focaccia recipe).This is a great option for a relaxed Saturday or Sunday morning. You can easily look after this while you’re making a leisurely breakfast.
I call these two methods “Good” and “Best”. You can see the differences in the photo below. The loaf on the right (the “stretch and fold” loaf) is taller due to the method of preparing the dough. The stretch and fold method produces air bubble nuclei under more tension than with the “zero effort method”. So, when the “stretch and fold” dough goes into the hot oven, the gas in the dough quickly expands (this is called oven spring) and is able to hold its shape as it grows.
Both bread doughs are baked in a Dutch oven. You’ll notice I’ve taken both loaves to a point where they’re a medium-dark golden brown color. They’re delicious like this, in my opinion. If you’re feeling brave, though, many people in Castelli Romani take this bread to a stage much darker than this.
Classically, the bread in baked in wood-fired brick ovens until it’s black and almost burnt. We mimic this oven environment at home by using a Dutch oven. This bread is delicious taken to a much darker crust level. (I just didn’t want to scare you with bread that you might think looked burnt)! So, feel free to experiment with just how dark you want to take this bread.

The results you get using the two different methods—both are fantastic! The “best” method (using the stretch and fold technique) delivers a taller loaf due to the method producing more oven spring.
Now, as you can see from the cut slices of bread in the photo below, the two methods deliver loaves with another difference—their crumb structures. The zero effort loaf (on the left) has a more closed crumb structure, while the stretch and fold loaf (on the right) has a more open texture.
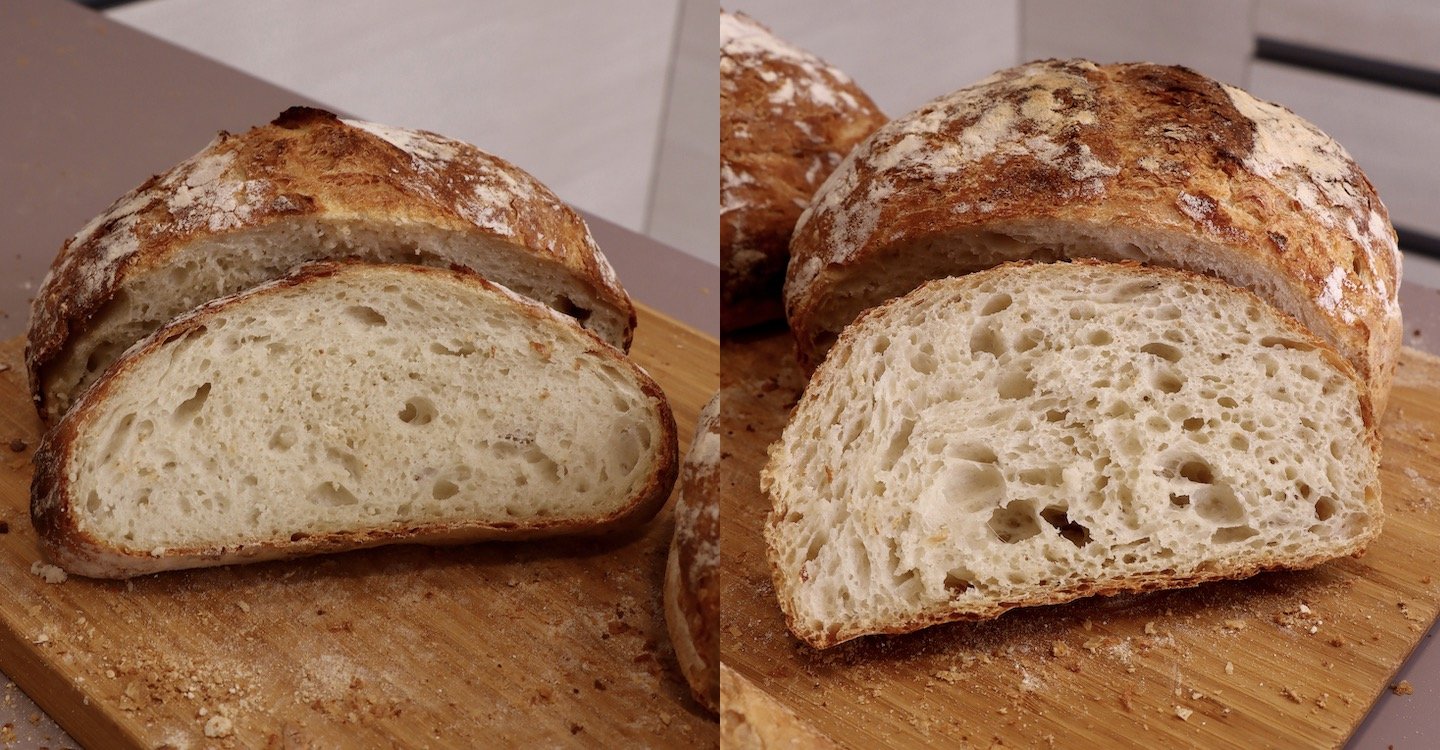
The crumb structures of the two different loaves. On the left, the “zero effort” loaf; on the right, the “stretch and fold” loaf. The stretch and fold loaf has a more open texture.
This difference is due to the way we prepare the “zero effort” dough. In the zero-effort method, we deliberately over-proof the dough (by leaving it alone all day to ferment). Then, we quickly “rescue” the over-proofed dough just before baking in the afternoon or evening.
Nonnas have been rescuing over-proofed dough in this way for hundreds of years (did you know, some rather famous chefs I won’t mention think they invented this technique a few years ago?)! This produces a perfectly proofed final result, but with a different crumb structure to the loaf made with the stretch-and-fold method.
While I call these two methods “good” and “best”, they’re really just “different”; and as I said above, the “good” method is historically the most authentic. The “best” version is more like the versions professional bakers would make, and so you’ll sometimes find this more aerated version for sale in bakeries in Castelli Romani. Please feel free to make the version you like the look of the most, or even try both!
Why is there no final shaping step in making this bread?
With many breads, a final shaping step is required to ensure good oven spring when baking the loaf. But, as long as you follow the methods I give you, it’s not necessary when making this bread in a Dutch oven. The reason is, we create sufficient tension in the dough just from the stretching and folding. Of course, you can use a final shaping step if you want to! However, this recipe is designed to be the easiest of easy methods. Every step we can cut out, makes the bread easier to make.
What kind of flour should I use for this bread?
You want to use a flour with at least 11% protein content to make this bread.
To make the authentic Italian version of this bread, you should use an Italian Type 0 or Type 00 flour, with a high protein content—I used a Type 00 flour with 11.5% protein. Be careful with this. Italian 00 flours are made with different protein content for different applications. Type 00 flours for pizza and bread have high protein content, and are what you want for this bread. However, Type 00 flours designed for making pasta, cakes and pastries can have very low protein content and may not work at all.
Remember, though, this is supposed to be an easy loaf. So, there’s no need to seek out special Italian flours unless you want to. Any white flour with enough protein content will work perfectly!
In the United States and Canada, where “hard wheat” is grown, all-purpose flour will do the job well. Bread flour, which has even higher protein content, will also work perfectly.
In the UK, though, where “soft wheat” is grown, all-purpose plain flour, might not have enough protein content. Likewise, plain flour in Australia tends to have lower protein content than US all-purpose flour. So, I’d recommend using bread flour for bread making in the UK, Australia and New Zealand.
For other countries, which classify flours differently e.g., Italy, France, Germany and others, and in countries where different wheats are used, I recommend checking the packaging to make sure your flour has a high enough protein content.
Please note. Different flours will absorb different amounts of water. So don’t be afraid to adjust the water amount to get the right dough consistency. It needs to be sticky. In the instructions for making the bread, I give some advice on how to do this.
What kind of yeast should I use?
You can use any kind of dried yeast you find in the supermarket. Look for products with names like “active dry yeast”, “instant dry yeast”, or “instant yeast”. These products come in sachets, boxes, jars and cans. All will work great.
Once you’ve opened a jar, can or sachet of dry yeast, it won’t last forever. It’s best to store it in the fridge, or even the freezer. That way, it will last a few months. Say around 4 months in the fridge, or 6 months in the freezer. So, if you’re not planning on using yeast that much, it’s best to buy it in the smallest quantity you can.
What if I don’t have a Dutch oven?
Traditionally, this bread is made in a cast iron pot with a lid—that is, a Dutch oven. Enamelled cast iron pots, such as the ones made by Le Creuset work particularly well. Those can be expensive to buy (especially the famous brands), but on-line you can find inexpensive versions that cost tens of dollars. You don’t even need to spend that much though—there’s nothing wrong with using an old or second hand one. They last forever.
I use one of my mom’s old pots—it’s well over 40 years old, and still going strong (even if it is chipped, and has the odd crack)! When Dutch ovens are damaged like this, with chips in the enamel and small cracks, they are incredibly inexpensive to buy second hand because they have very limited uses in the kitchen. You wouldn’t want to cook anything with a liquid in them, for example, in case they break. They’re perfect for baking bread though, and work just as well as a new one costing hundreds of dollars!

Making the bread in an old pot belonging to Emma Fontanella’s mom.
You don’t have to use a Dutch oven, though. You can get great results with lots of containers. They key is that the bread is covered during the first phase of baking, to create a microenvironment with steam.
Here are some other ideas for achieving that:
A large ovenproof saucepan with lid
A stockpot or soup pot with lid
A pizza stone or baking tray with an upside-down ovenproof bowl or saucepan
A large glass Pyrex dish with lid
A large clay baker with lid
A deep roasting dish, with a tented lid made of foil
You get the idea! As long as you can cover the bread without touching it in the first phase of baking, you’re good to go! Make sure anything you use is ovenproof to the temperatures you’re setting your oven to.
Depending on what option you use, you might need to line the bottom with parchment paper to prevent the dough from sticking.
What if my dough doesn’t rise or double in size?
There are two possibilities. First, your yeast is old and has died. Second, your dough is too cold for the yeast to grow much in the time you’re eating for the dough to rise or double in size. In that case, give the dough more time, and maybe place it in a warmer spot.
Is this bread sourdough?
No, it’s not sourdough. It looks similar to many sourdough loaves you’ll see, but it’s made simply with regular dried yeast you can buy in any supermarket.
What’s the difference between artisan and rustic bread?
An artisan bread is one made using traditional methods, rather than mass-produced industrial methods. Rustic bread is a style of bread - typically baked freeform and made in a square loaf pan. So, you can have a artisanal rustic bread, if it’s made using traditional methods. And you can have an industrial, mass produced rustic loaf, like you might find in a supermarket.
What is rustic bread made of?
A good rustic bread is made with just a few simple ingredients: flour, water, yeast and salt. That compares to industrially produced bread which can have ten or twenty ingredients, all designed so that the bread can be mass-produced as quickly and as cheaply as possible.
What is the difference between rustic bread and sandwich bread?
Typically, sandwich bread is baked in a square loaf pan, and is baked to have a soft crust and close-textured crumb. Whereas, rustic bread isn’t baked in a square pan, and often has a crispy crust and open texture. However, it’s important to remember that many rustic breads can be used make incredible sandwiches!
Is rustic bread better for you?
An artisanal rustic bread, made with just a few simple ingredients and a long fermentation it’s certainly better for you than mass-produced industrial bread. Having said that, no bread is a weight loss food—it’s quite calorific. So it’s important to eat even really good bread in moderation as part of your diet.
EQUIPMENT
A large Dutch oven (or other container - see above). The minimum size is 8 inch (20cm) diameter and 3½ inches (9cm) deep. That’s a minimum capacity of 3 quarts (2.8 liters).
INGREDIENTS
For Method 1
1¼ cups (300g) lukewarm water, that is somewhere between 80°F and 100°F (27°C to 37°C)
2 tsp (8g) kosher salt
1 tsp (3.5g) any dried yeast
3 cups (420g) all-purpose flour, plus more for dusting
For Method 2
1¼ cups (300g) lukewarm water, that is somewhere between 80°F and 100°F (27°C to 37°C)
2 tsp (8g) kosher salt
2 tsp (7g) any dried yeast
3 cups (420g) all-purpose flour, plus more for dusting
INSTRUCTIONS
Prepare the dough using your choice of either Method 1 (Zero Effort) or Method 2 (Stretch and Fold). See the section “About the two methods of making this bread” above, to understand the differences in the two methods.
Method 1 — Zero Effort
Make and proof the dough
In a large bowl (the biggest you have) combine the water, salt, and yeast. Give these a good stir to mix them well.
(Don’t worry about mixing the salt and yeast directly. It’s a myth that this kills the yeast!)
Add the flour and mix using a large spoon or spatula until all the flour is incorporated. Scrape down the sides as best you can with your spoon or spatula.
The dough should be very sticky. So, depending on your your flour, you might need to add more water (see the section “What kind of flour should I use for this bread?” above). Add extra water 2 tablespoons at a time, and fully incorporate to check the change in “stickiness” of the dough.
Cover the bowl with a large plate, and leave on the counter for the day to rise (e.g., while you go out to work).
That’s it, your dough is made. Leave it for a minimum of 6 hours.
Pre-heat your oven and Dutch oven
When you’re ready to bake your bread in the afternoon or evening, pre-heat your oven to 450°F (230°C) with your empty Dutch oven in the oven for 10 to 15 minutes.
Give the dough some love
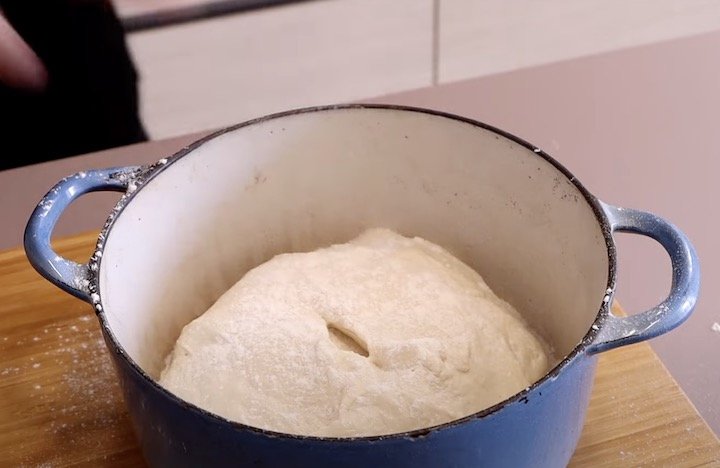
After 6 hours or more, your dough will be in serious need of attention. It will probably have risen, and then collapsed in on itself (see photo below).
This is what is known as being over-proofed. This is not what we want in a bread dough, but we can easily rescue it in the way that Italian grandmothers have been doing for hundreds of years. It only takes a few seconds.

The dough has risen, but then collapsed in on itself. This dough is badly over proofed. Don’t worry - we can rescue it!
To rescue the dough, simply perform one quick round of four stretches and folds (see the stretch and fold technique in Method 2 below for details). That’s it, your dough is rescued.
Allow the dough to rise again before putting in the oven. In summer, this will likely happen quickly (in say 15 minutes). If in winter, when it’s colder, it might take half an hour.

Rescuing the over-proofed dough with a quick series of stretches and folds.
Bake the bread
Now, take the hot Dutch oven out of the oven. (Be careful to use oven gloves!). Dust the bottom with flour (see photo).

Dust the bottom of the pot with flour
Then, gently pick up the dough and drop it into the pot. Make one snip in the top using a pair of scissors (see photo).

Making a cut into the top of the loaf
Dust the top of the loaf with flour (see photo)
Dusting the top of the loaf with flour
Put the the lid on on the Dutch oven, and transfer to the preheated oven.
Bake with the lid on at 450°F (230°C) for 30 to 35 minutes.
Then remove the lid, drop the oven temperature to 400°F (200°C) and make for another 10 minutes or longer, or until you’ve achieved the color of crust you want.
Allow the bread to cool
Using a wood spoon or spatula, carefully remove the bread from the Dutch oven and allow it to cool on a wire rack (or turn the bread on its side). Leave it for at least 45 minutes before cutting in to it.

Removing the finished loaf from the Dutch oven
Dough Method 2 — Stretch and Fold
In a large bowl, combine the water, salt, and yeast. Give these a whisk.
Add the flour and mix using a large spoon or spatula until all the flour is incorporated. Scrape down the sides as best you can with your spoon or spatula.
The dough should be very sticky. So, depending on your flour, you might need to add more water (see the section “What kind of flour should I use for this bread?” above). Add extra water 2 tablespoons at a time, and fully incorporate to check the change in “stickiness” of the dough.
Cover the bowl with a large plate, and leave on the counter for 30 minutes.
Stretching and folding the dough
We are going to perform four or five rounds of "stretches and folds". Take one side of the dough, stretch and fold bringing the dough to the opposite side of the bowl. Rotate the bowl one quarter and repeat another 3 times. (See video for details of the stretch and fold technique.)

Stretching the dough

Folding the dough
Cover the bowl and leave for 30 minutes.
Repeat the stretch and fold process another 3 or 4 times, leaving 30 minutes in between each round. At the end if this time, the dough should have double in size.
Allow the dough to rise again after the final round of stretches and folds before putting in the oven (while you’re pre-heating your Dutch oven). In summer, this will likely happen quickly (in say 15 minutes). If in winter, when it’s colder, it might take half an hour.
If the dough hasn’t risen much, it might be that the dough is too cold for the yeast to grow quickly. Give it up to 4 hours to see if it rises. See also the section above, “What if my dough doesn’t rise or double in size?“
To bake the bread
Pre-heat your oven to 450°F (230°C) with your empty Dutch oven in the oven for 10 to15 minutes.
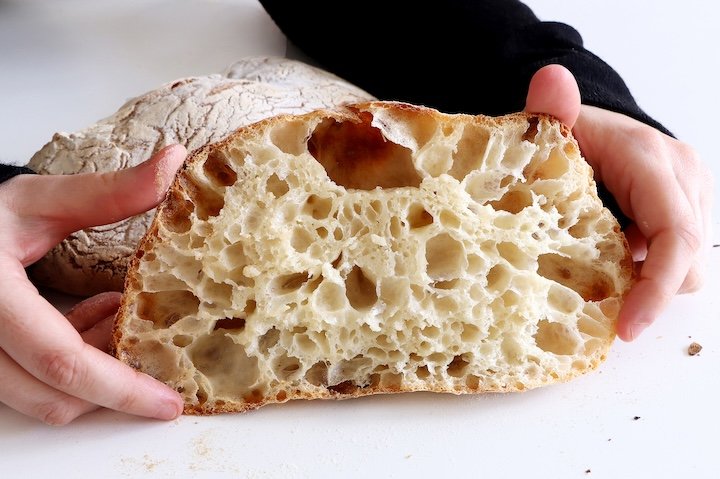
Then, to bake the bread, simple follow the steps in Method 1 above, from the step “Bake the bread” onwards. The finished loaf should look similar to the photo below.

The finished loaf made using the “stretch and fold” method
How to make an Italian grilled cheese sandwich
An Italian grilled cheese sandwich made with the Pane dei Castelli and fontina cheese
This bread is great for making an Italian grilled cheese. I like to use fontina cheese because it melts so beautifully and has great flavor.
Using a serrated knife, cut two slices of bread. Freshly shred your cheese. (Pre-shredded cheese doesn’t work well because it has a coating which stops it melting properly)

Shredding the fontina cheese
Top one of the slices with the freshly shredded fontina cheese.

Assemble the sandwich and fry over a low-medium heat in olive oil. Towards the end of cooking, add a tablespoon of butter to give extra color.

Frying the grilled cheese sandwich
Remove from the pan, and serve.

The finished Italian grilled cheese.
If desired, cut in half before serving. As with an American grilled cheese, this is great by itself, or a with a bowl of tomato soup.
You might also like…
4-Ingredient No Knead Ciabatta
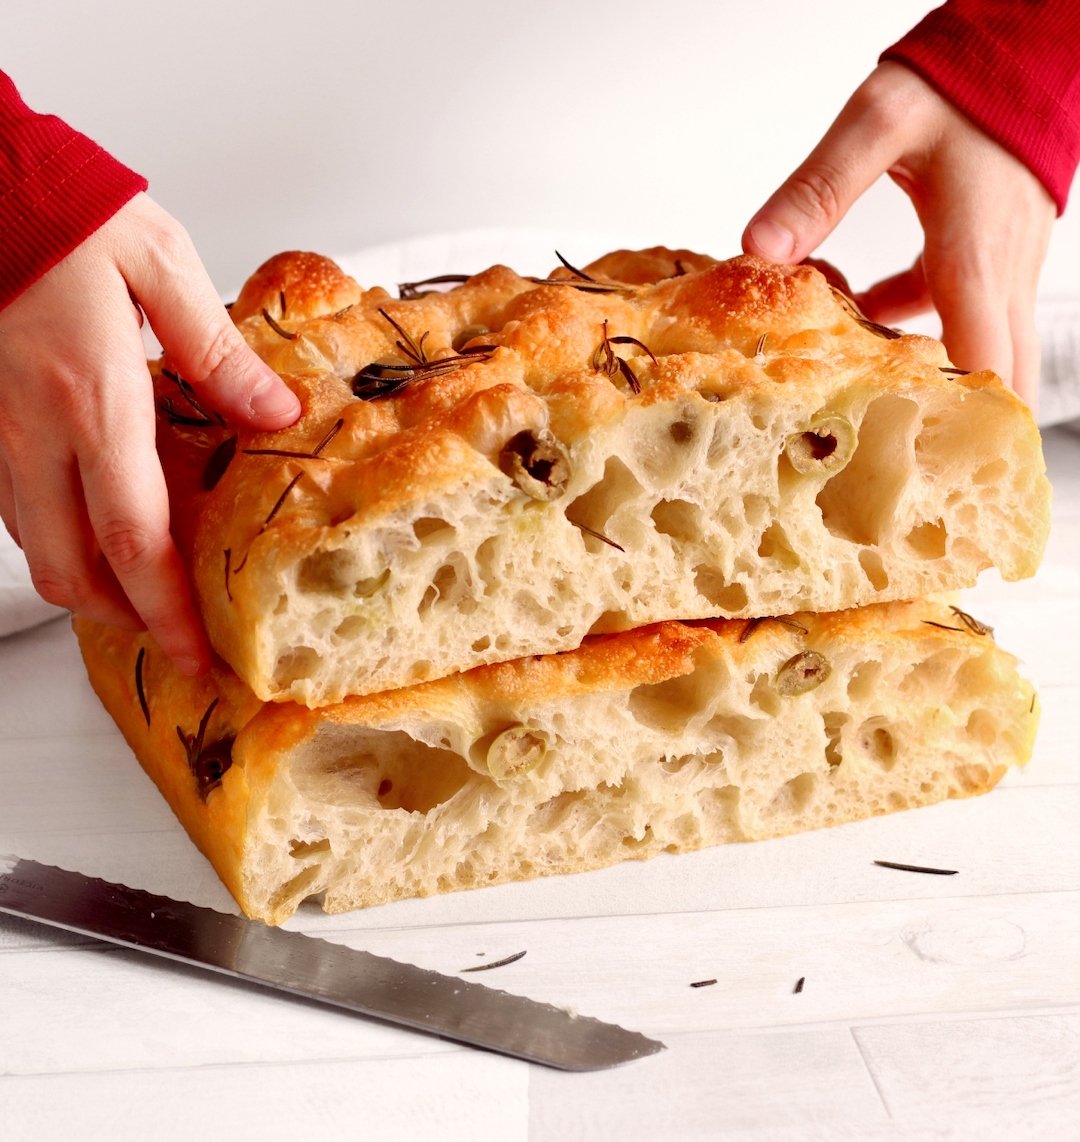
Big Bubble No-Knead Focaccia
Watch the video for more tips on the technique for making this easy rustic no-knead Italian bread.
Categories: Easy bread recipes, 3 ingredient bread

Hi! I’m Emma Fontanella. Here you’ll find trusted, tested recipes to satisfy your baking addiction and carb cravings. Learn more…
Tried one of my recipes? Please let me know on Instagram (@emmafontanella) or TikTok (@emma.fontanella)! Hashtag #emmafontanella
Search for another recipe…