
Big Bubble No-Knead Focaccia Bread Recipe
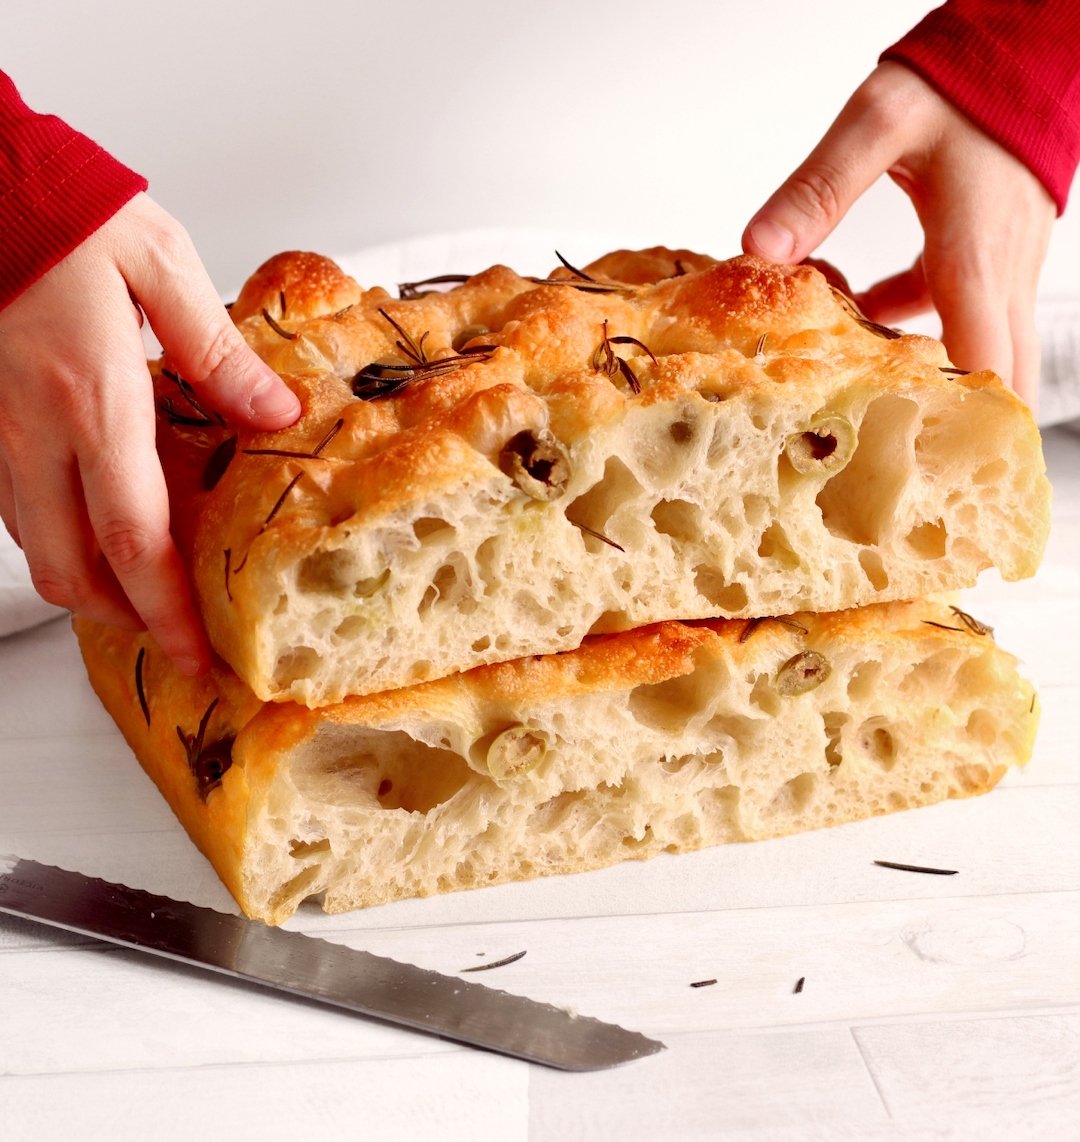
Emma Fontanella’s big bubble, no-knead focaccia
About my Big Bubble Focaccia
This focaccia recipe is a no-knead recipe, so it’s super easy to make and delivers next-level results. It requires no special equipment such as a stand mixer.
I know many of you like big bubbles in bread as much as I do. So, I wanted to give you a fool-proof, no-knead method for making focaccia with my signature big airy bubbles, a super soft inside texture, and a delicious crispy crust. This makes for an incredibly versatile bread.
In this recipe, I’m using simple toppings—olives, fresh rosemary and salt. You can use whatever toppings you like, though, e.g., tomatoes, garlic, onions, or cheese. You’ll find all these toppings and more used on the many different styles of focaccia found throughout Italy.
This particular focaccia makes an amazing sandwich bread. Simply split it open horizontally, optionally remove some of the insides of the bread, and add the fillings of your choice. I like to keep it simple with prosciutto di Parma and fresh buffalo mozzarella torn into pieces. That’s my perfect focaccia sandwich, but please feel free to use whatever fillings you like!
What kind of olive oil should I use for this focaccia?
Like many kinds of focaccia, this version contains a lot of olive oil. The flavor of the olive oil you use will end up as an important flavor component in the finished bread. My personal recommendation would be to use a good Ligurian extra virgin olive oil made with Taggiasca olives. However, any extra virgin olive oil that you like the taste of will work perfectly.
What kind of flour should I use for this focaccia?
For this recipe I used an Italian 00 flour with 12% protein, designed for pizza and bread making. This flour is made with an Italian soft wheat. The 00 designation means the flour has a low ash content, and the starch granules will mostly be left intact in the milling process. Please be careful not to mistakenly use a low protein 00 flour designed for pasta or cake making.
You don’t have to use this kind of Italian flour. You can use a bread flour and get spectacular results. A typical US bread flour will be made with a hard US wheat. Both the nature of the protein and the amount will be different to the Italian 00 flour, though; and the ash content may be higher. Also, importantly, when hard wheats are milled, many of the starch granules will be damaged.
Why does this matter to you? Well, all these factors will affect the amount of water you’ll need to use in the recipe. Specifically, if you use a bread flour, especially one with higher protein content (say 13% or 14%), you may need to add more water to get the right “wet consistency” of dough.
Why does the type of flour affect how much water the dough needs?
How does the type of flour affect how “thirsty” a flour is for water? The key properties of a flour that affect water absorption are:
Protein content. The higher the protein content of flour, the more water it will absorb
Protein quality. Protein from hard wheat varieties tends to absorb more water than protein from soft wheat varieties
Starch. The more “damaged” the starch, the more water the flour will absorb. Flour made from hard wheat tends to have many more damaged starch granules than flour made from soft wheat.
Moisture content. If your flour has already absorbed water from the atmosphere, it will take less water when you’re making dough
Additives. Some flours contain additives called pentosans. The higher the amount of pentosans, the more water the flour will absorb.
So, often, a “high protein content US bread flour” will absorb more water than a ”high protein content Italian 00 flour”. Ultimately, that’s because US bread flour is made from hard wheat and Italian 00 flour is made from soft wheat.
Regional focaccia variations in Italy
There are literally thousands upon thousands of different focaccias made across Italy. On the Internet, in cookbooks, and on TV shows, you will often find people saying that a particular region of Italy produces a particular style of focaccia.
However, in my opinion, it’s far too simplistic to say a particular region makes a single style. Even within a single region of Italy, you can find hundreds of variations.
What kind of variations? Well… a fine crumb or an open bubbly crumb; higher hydration or lower hydration; tall with crunchy edges or flat with soft edges; more salt, no salt; the dimples doused with salt water or not, baked with olive oil or baked with lard; or even baked without any oil at all; with toppings or without toppings; made using what kind of flour (or mixtures of flours); the inclusion of other starches such as potato.
I hope you can now see why there are so many variations of this bread! Unsurprisingly, all this variety can be incredibly confusing. Some people will tell you they’ve had only thin focaccia from a particular region, while someone else might tell you they’ve had only 2 inch thick focaccia from the same region! Both can be correct!
Where is this style of focaccia from?
You may be asking yourself—what particular kind of focaccia is this recipe? This focaccia is my own recipe, based closely on one of my mom’s, but using a different kind of flour.
If you wanted to analyse the etymology of it, you could say it’s a cross between some versions of focaccia found in Liguria and some versions of a bread called schiacciata (a close relative of focaccia) found in Tuscany.
I designed this particlar focaccia to be exceptionally versatile because I like to use it for all sorts of things, including making sandwiches… and also because I love big bubbles in bread! In fact, when the dough for this particular focaccia is fermenting, I’m often to be heard exclaiming in excitement, “She’s a bubbler!”
What is focaccia—and why is everyone obsessed with it?
Focaccia is an Italian leavened flatbread. It is popular throughout Italy and comes in many different forms, with different toppings. It has become exceptionally popular outside Italy for one good reason—it’s utterly delicious. It’s great as an appetiser, perhaps be dipped in oil and/or balsamic vinegar. It’s great as an accompaniment to main dishes. The version in this recipe also makes an amazing sandwich bread.
How is focaccia different from regular bread?
The main differences between focaccia and most other types of bread are that focaccia is made with a lot of olive oil, and it has a variety of delicious toppings e.g., garlic, olives, fresh rosemary, cherry tomatoes, cheese, onion etc.
Is a focaccia healthy?
It depends what you mean by healthy! You won’t lose weight by eating a lot of focaccia! But, if you make it yourself, like you’re doing with this recipe, it’s made with great ingredients. So it’s very healthy when eaten in moderation.
What does focaccia mean in English?
In English, focaccia refers to type of Italian flatbread usually made with olive oil, with a variety of different toppings. The origin of the name goes back to Ancient Rome, where the name refers to the fact that, before modern ovens, focaccia-style breads were made on stone over an open fire.
Is ciabatta the same as focaccia?
No, ciabatta and focaccia are completely different, although both are Italian breads. Focaccia is kind of flat bread, made with lots of olive oil and toppings embedded in dimples on the top surface of the bread. Whereas, ciabatta is a taller loaf of bread with a crispy crust. It contains little or no oil, and has no dimples in the top, and no toppings.
EQUIPMENT
A 9x13 inch tray (at least 2 inches deep)
INGREDIENTS
For the dough
2 cups (470g) lukewarm water. That is somewhere between 80°F and 100°F (27°C to 37°C). (See also “About the amount of water you need” in the instructions)
2 tsp (11g) salt
1 tbsp extra virgin olive oil, plus lots more for greasing the tray and drizzling
7g dried yeast (any kind of dried yeast—active or instant— will work)
4 cups (560g) bread flour or Italian 00 flour, with 12% protein content (please see the discussion about flours above)
Toppings
Rosemary
Olives
2 tbsp olive oil
Flaky sea salt
INSTRUCTIONS
Make the dough
In a large bowl combine the water, salt, olive oil and yeast. Give these a whisk.
Add the bread flour and mix using a large spoon or spatula until well combined and hydrated.
Scrape down the sides and cover the bowl for 30 minutes.
About the amount of water you need
Please note, depending on how “thirsty” your flour is, you might need to add more water to get the wet dough consistency you’re looking for (see the photos below for the right consistency). So if your dough is dry, don’t be afraid to add more water.
The reason for this is—different flours absorb water differently. For more information, see the sections above titled, “What kind of flour should I use for this focaccia?” and “Why does the type of flour affect how much water the dough needs?”
Stretching and folding the dough
We are going to perform four rounds of "stretches and folds". Take one side of the dough, stretch and fold bringing the dough to the opposite side of the bowl. Rotate the bowl one quarter and repeat another 3 times. (See video for details of the stretch and fold technique.)

Stretching the focaccia dough

Folding the focaccia dough
Cover the bowl and leave for 30 minutes.
Repeat the stretch and fold process another 3 times, leaving 30 minutes in between each round.
Allow the dough to proof
After your last series of stretch and folds, cover the dough with plastic wrap and place in the fridge over night. Please note: I have given you an option to skip this step if you want your focaccia the same day—see three paragraphs down, beginning “Or, if you want a quicker result…”). I really do recommend the overnight method, though.
Allowing the dough to sit overnight will improve the gluten development in the focaccia. It needs to go in the fridge for this long period (so-called cold-fermenting), to slow down the yeast growth and stop the yeast digesting too much of the flour. The slower yeast growth also leads to better flavor development.
If you want to, you should be able to cold-ferment this dough for up to 48 hours in the fridge, for even better flavor development. If you leave it longer than that, you risk it over proofing, which means the dough won’t rise in the oven and support big bubbles as it bakes.
Or, if you want a quicker result, you can skip the cold fermentation in the fridge completely. Instead, you can simply allow the dough to sit one last time at room temperature for 30 to 40 minutes.
Shaping the focaccia and final proofing
After either the overnight cold-fermentation, or the quicker method where you skipped that, you’re ready to shape the focaccia in a baking tray.
Into a 9x13 inch tray (at least 2 inches deep) add 3 to 4 tbsp of olive oil. Be generous with the oil, focaccia craves it. Grease the tray well. (If your tray is not non stick, line the bottom with parchment paper before adding the oil.)
Carefully perform one last series of stretches and folds and then gently place the dough into your tray. Drizzle with more olive oil.
Cover well and allow to proof one last time for at least 1 hour. Please note: if you cold-fermented the dough in the fridge overnight, the dough will need to rise in the tray for around 2 hours at room temperature because it will still be cold from the fridge.
After the final proof, drizzle the dough with more olive oil (yes, really!). Then, cover your hands with oil, and gently make dimples in the dough. Jiggle the dough to spread the it out in the pan. (See the video for details).

Making dimples in the dough
Add the toppings of you choice, making sure the toppings are oiled to prevent burning.

The focaccia with toppings added, ready to go in the oven
Bake the focaccia
Preheat the oven to 400°F (200°C) with the fan on (if your oven has a convection fan) and bake the focaccia for about 20 to 25 minutes (it's done when the top is golden and crispy).
Remove from the oven and wait for at least 10 to 15 minutes before slicing into it. (Focaccia can be served warm or cold - it’s great when it’s still warm because the outside will still be crispy).
How to make an Italian focaccia sandwich
Focaccia is an incredible bread for making sandwiches with. Using a serrated knife, split the bread open horizontally. Then, remove some of the insides of bread if you think it’s too much for you to eat in a sandwich. Add the toppings of your choice to the base. I like prosciutto di parma and fresh buffalo mozzarella, torn into pieces.

Assembling the focaccia sandwich
Finally put the top the bread back on and cut into sandwiches of the size you want.

The finished focaccia sandwich
Obviously, you can use whatever fillings you prefer!
Top Recipe Tips
You can easily halve this recipe. If you do, bake the focaccia in an 8 inch square pan, at least 2 inches deep.
Focaccia is great when it’s warm. If you want to make it ahead, it reheats beautifully the next day. Put it in the oven for about 10 minutes to re-crisp the outside and warm the interior.
You might also like…

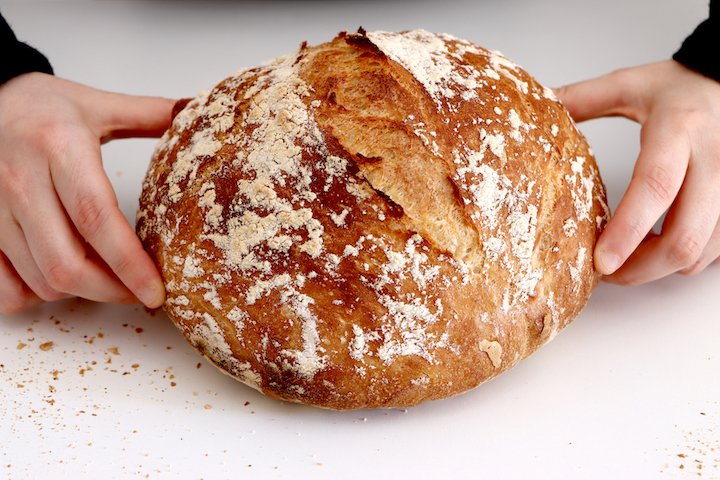
Easy Italian No-Knead Bread Recipe
Watch the video for more tips on the technique for making this focaccia


Hi! I’m Emma Fontanella. Here you’ll find trusted, tested recipes to satisfy your baking addiction and carb cravings. Learn more…
Tried one of my recipes? Please let me know on Instagram (@emmafontanella) or TikTok (@emma.fontanella)! Hashtag #emmafontanella
Search for another recipe…