
Overnight No-Knead Dinner Rolls
Emma Fontanella’s Overnight No-Knead Dinner Rolls
About My Overnight No-Knead Dinner Rolls
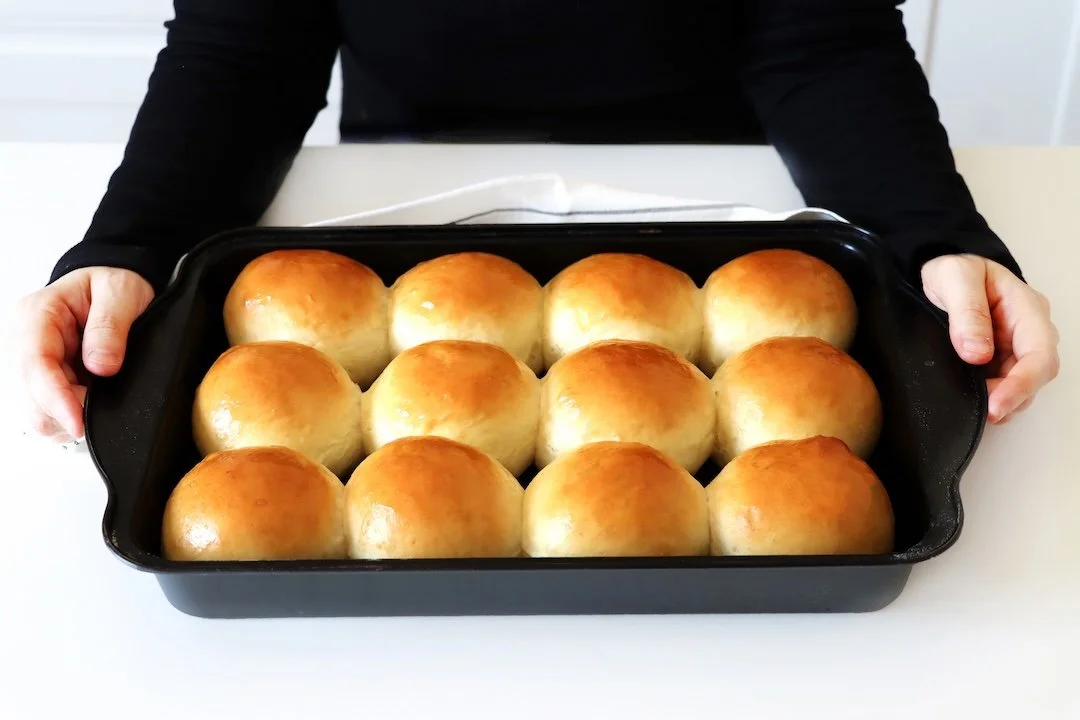
Soft, buttery, bakery-style dinner rolls made with zero kneading. Prepped in just minutes the night before, these cold-proof overnight rolls make holiday hosting simple and stress-free.
Anyone can make these — no special equipment needed! You just need an ovenproof dish to bake the rolls in. I use an 8×6-inch (20×15 cm) baking dish.
This recipe is based on the Soft Dinner Rolls recipe in my cookbook, Simple Pleasures.
About the flour in this recipe
I developed this recipe to use all-purpose flour (plain flour if you’re in the UK or Australia). That way, anyone can make these, even if you’re not usually a bread maker and don’t have strong bread flour at home.
Leave enough time on baking day
This is an overnight bread recipe where the dough goes into the fridge overnight. This will slow the yeast down and help develop amazing flavor in the dinner rolls. That means, the next day when you pull the dough out of the fridge, it will be cold. So, it will take a while to come up to room temperature and for the rolls to rise for the second time. So, make sure to leave an hour for that if your kitchen is warm, and two hours if your kitchen is cold (see Step 7 in the recipe instructions below).
What kind of yeast should I use in this recipe?
You can use any kind of dried yeast in this recipe. You will see that I hydrate and activate the yeast before incorporating it into the flour. The packet instructions on your yeast will probably tell you that this is not necessary. While this is true if you’ve just bought a new packet, over time, the yeast becomes less active. So, if you’ve had your yeast a while, this small extra step of hydrating the yeast first is helpful in making sure you get a good rise.
Can I make these dinner rolls the same day?
Yes, it’s easy to adapt the recipe to work as a same-day recipe. The ingredients stay the same, except you’ll want to add an extra teaspoon of yeast just to make sure the dough rises quickly. And you’ll need to knead the dough (I use a stand mixer for this).
Can I veganize this recipe?
Yes, absolutely! Simply substitute the dairy butter and milk with your favorite plant-based alternatives. The original dough also includes an egg. Replace it with ¼ cup (60 ml) of unsweetened applesauce (or 3 tablespoons of aquafaba) to keep the rolls soft and tender. For the "egg wash," brush the tops with soy milk, It has a naturally high protein content that promotes excellent browning and gives a lovely golden finish without eggs.
RECIPE DETAILS
Yield: 12 rolls
Hands-on Prep Time: 10 minutes
Equipment: 8×6-inch (20×15cm) baking dish
First Rise (Room Temp): 2 hours
Overnight Rest (Refrigerator): 8–12 hours
Second Rise (Shaped): 1–2 hours
Bake Time: ~20–25 minutes (until deep golden)
Oven Temperature: 350°F (180°C)
INGREDIENTS
For the dough
2½ tbsp (40g) unsalted butter, melted
⅓ cup (80g) whole milk
⅓ cup (80g) water, plus more if needed (see instructions)
1 large egg, room temperature
2 tbsp (30g) granulated white sugar
1½ tsp salt
2 tsp (7g) active dry yeast
2½ cups (350g) all-purpose flour
½ tbsp oil (for greasing the bowl)
For the Egg Wash
1 egg, beaten
A splash of milk
For Assembly & Finishing
Extra butter (for greasing the baking pan and greasing the bowl)
Extra butter (for brushing over hot baked rolls)
INSTRUCTIONS
Day 1: Mix & Cold Ferment
1. Activate the Yeast. In a large mixing bowl, melt your butter. Whisk in the warm water, warm milk, 1 egg, granulated sugar, salt, and yeast until combined. Let the mixture sit for 5 to 10 minutes until the surface turns frothy and foamy.
2. Mix the Dough (No Kneading). Add the all-purpose flour and an additional pinch of salt. Stir everything together with a wooden spoon for about 2 minutes until a shaggy dough forms. If the mixture seems slightly dry, incorporate 1 to 2 tablespoons of extra water. Use clean hands to finish bringing the dough together, ensuring no dry pockets of flour remain.
3. Room Temperature Rise. Scrape down the sides of the bowl. Cover tightly with plastic wrap and let the dough rise at room temperature for 2 hours.
4. Smooth & Chill. After 2 hours, the dough will appear somewhat lumpy. Gently gather the dough into a smooth ball. Place it into a clean, greased bowl, cover tightly, and transfer to the refrigerator to rest overnight. The cold fermentation develops flavor and naturally strengthens the gluten without any kneading.
Day 2: Shape, Proof & Bake
5. Prep the Baking Dish. Liberally grease a baking dish or pan with softened or melted butter to ensure golden, flavorful bottoms.
6. Divide & Shape. Remove the cold dough from the refrigerator (it will feel firm). Divide evenly into 12 pieces using a bench scraper or knife. Gently roll each portion between your palms into a tight, smooth ball.
7. Arrange & Second Rise. Place the dough balls in the prepared pan, leaving a small gap between each piece to allow room for expansion. Cover loosely with plastic wrap or a clean kitchen towel. Let the rolls rise at room temperature for 1 to 2 hours, until puffy and expanding enough to lightly touch one another.
8. Preheat & Glaze. Preheat the oven to 350°F (180°C). Whisk together the remaining egg and a splash of milk to make the egg wash. Gently brush the wash over the tops of the proofed rolls for a high-gloss golden crust.
9. Bake. Bake at 350°F (180°C) until the rolls are evenly golden brown on top and cooked through.
10. Butter & Serve. Remove the rolls from the oven and brush the hot tops immediately with melted butter. Serve warm.
Watch the video for more tips

Hi! I’m Emma Fontanella. Here you’ll find trusted, tested recipes to satisfy your baking addiction and carb cravings. Learn more…
Tried one of my recipes? Please let me know on Instagram (@emmafontanella) or TikTok (@emma.fontanella)! Hashtag #emmafontanella
Search for another recipe…
