
Devil’s Food Cake Recipe
About my Devil’s Food Cake recipe
Devil’s Food Cake should be soft, rich, intensely chocolatey, and incredibly moist. It’s a world-famous cake for a reason—anyone who likes chocolate cake will absolutely love it!
The secret to my version is the method of preparing the batter. Unlike most cake recipes where you make the batter in a mixing bowl, in this recipe we will make the batter in pan over heat. This method allows us to create a batter where we develop an intense chocolate flavor, and provides for super moist texture in the final cake.
For the frosting, I’m using a recipe I developed that’s easy to put together, and gives you a creamy, decadent chocolate frosting that has the perfect texture for frosting a cake and has exactly the level of decadence we want for a Devil’s Food Cake.
How good does a slice of this cake look?! Look at the moist crumb texture! I can eat more than one slice of this. So if you make this cake, and your family or friends are anything like me, I hope you have enough for seconds!

A slice of Emma Fontanella’s rich, super moist Devil’s Food Cake
How long will this cake stay fresh?
You can keep this cake in the fridge for up to 5 days. You must cover it (I use an upside down pot) to stop it drying out.
You need to take the cake out of the fridge at least 30 minutes to an hour before you want to serve it, otherwise it will taste hard and stale.
What is the difference between chocolate cake and Devil’s Food Cake?
Devil’s Food Cake is a special kind of chocolate cake. It’s known for its rich deep flavor, and moist and tender crumb.
The tender cake texture comes from the sour cream in this recipe, but can come from buttermilk in some recipes. Devil’s food cakes also have rich, creamy chocolate frostings.
In comparison, chocolate cakes in general have a wide variety of textures and flavors, and can be paired with many different kinds of frosting.
Why is it called Devil’s Food Cake?
The origin of the name "Devil's Food Cake" is not known for sure. One popular theory is that the name came about because it can be thought of as the opposite of an “Angel’s Food Cake“. Devil’s Food Cake is rich and decadent, whereas Angel’s Food Cake is light and delicate.
Is Red Velvet Cake the same as Devil's Food Cake?
No, they’re completely different cakes. The confusion arises because the color red is often associated with the Devil.
However, red velvet cake is something entirely different. It has a light chocolate, slightly tangy flavor, along with its signature bright red color; and it’s typically paired with a cream cheese frosting.
Whereas, Devil’s Food Cake is a rich, indulgent chocolate cake, with a creamy chocolate frosting.
INGREDIENTS
For the cake sponge
1 cup (140g) all-purpose flour
1 tsp baking soda
¼ tsp salt
1½ cups (300g) white granulated sugar
1 cup (100g) unsweetened cocoa power
1 cup (240g) whole milk
¾ cup (180g) sour cream
2 eggs
2 tbsp coffee
1 stick (115g) butter
For the fudge frosting
¾ cup (80g) unsweetened cocoa powder
½ tsp salt
3¼ cups (400g) powdered sugar
1¼ cups (150g) unsalted butter, room temperature, cut into small pieces
½ cup (120g) heavy cream
INSTRUCTIONS
Preheat the oven and prepare the cake pans
Preheat your oven to 320°F (160°C).
Grease, flour and line with parchment paper two 8 inch cake pans. Set aside.
Making the cake batter
For this recipe, we’re going to make the cake batter in a pan on a cooktop.
This is an unusual method for making a cake batter and one that you might not be familiar with. So, we’ll go into detail so you understand what you’re doing at each stage.
Making the batter this way is super easy. Importantly, it’s the key to developing the rich chocolate flavor, and super moist texture that we want in a Devil’s Food Cake.
Combine the dry ingredients
In a large bowl combine the flour, baking soda, salt. Whisk and set aside.
Melt the butter into the milk
In a large deep sauce pan, add the milk and butter.
Turn the heat to medium and, stirring every now and again, allow the butter to melt and the mixture to heat up. Don’t let the mixture boil!
All you’re aiming to do in this step is melt the butter. So, once it’s completely melted, turn off the heat.
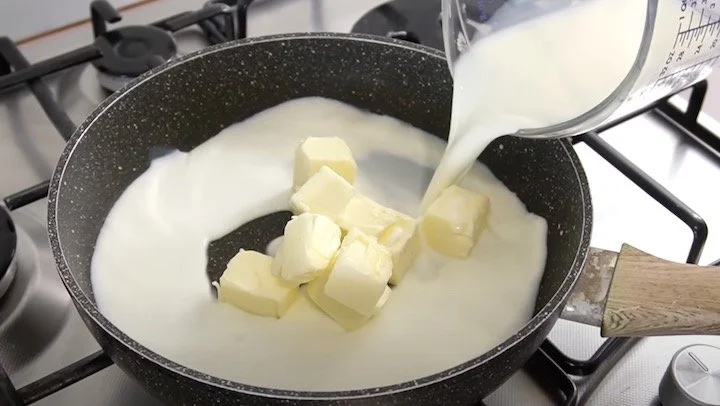
Melting the butter into the milk over medium heat
Develop the chocolate flavor and complete the batter
Add the cocoa powder and whisk to fully disperse the cocoa powder into the milk/butter mixture.
This process is called “blooming” the cocoa powder. It really intensifies the chocolate flavor by drawing out rich flavors that are trapped inside the solid cocoa particles.
Make sure to keep stirring while you’re blooming the cocoa powder. The more you stir, the more chocolate flavor you will create.

Adding the cocoa powder the melted butter./milk mixture
Once the cocoa powder is bloomed, add the coffee and sour cream and, using a spatula, combine until fully incorporated.
At this point, you should have a thick, rich, smooth and shiny mixture. Your kitchen will also be filled with delicious, rich chocolatey aroma!

The Devil’s Food cake batter at the stage just before adding the sugar.
Now add the sugar, and mix in until it’s dissolved Don’t be tempted to cut the amount of sugar in this recipe.
I know many of you like to cut the amount of sugar you use in baking, but my recipes are designed to have just enough sugar to get a good result.
If you cut the sugar in this recipe, your cake will end up bitter due to the large amount of unsweetened cocoa powder we’re using.

Adding the sugar and whisking
By this stage, the mixture should have cooled. So, now you can safely whisk in the 2 eggs without risking them cooking before you’re mixed them into the batter!
You can just whisk these in using a spatula. Just make sure to mix them in completely, so there are no bits of egg yolk or egg white let.

When the batter has cooled, you can incorporate the eggs.
Finally, add the the dry ingredients that you prepared earlier (the flour, baking soda, and salt).
Whisk until there are no more visible spots of flour. Be careful not to over mix—stop as soon as you can’t see any flour.
Use a spatula to scrape the bottom and sides of the pan. This will make sure you have missed any pockets of flour that got caught somewhere at the edges.

Adding the dry ingredients—the final step in preparing the Devil’s Food Cake batter
Baking the cakes
For this recipe, because the batter is wet, it’s important to bake the two layers in separate pans. You won’t get a good result if you try to bake one big cake and cut it into two layers.
So, if you only have one pan, bake the layers one after the other, re-using your pan.

One of the prepared cake pans with half the batter.
Devide the cake batter evenly between the two cake prepared cake pans and bake the in your preheated oven for 30 to 35 minutes.
Check the cakes after 30 minutes. Do the toothpick test, if it comes out clean the cakes are ready. If not, continuing baking, checking every 5 minutes until they’re done.
Allow the cakes to cool in their pans for 5 minutes. Then turn them out upside down onto a cooling rack. Remove the parchment paper and allow the cakes to cool completely.

Baking the two cake layers in two separate cake pans
Making the Devil’s Food Cake Frosting
In a large bowl combine powdered sugar, unsweetened cocoa powder and salt. Don’t skip the salt.
(I know you’re tempted to skip it, but this frosting really needs the salt. The salt has the effect of bring out the sweetness in the frosting, and cuts the bitterness of the cocoa powder).

Cut softened butter cut into little cubes. Note, it’s important that the butter is really soft—soft enough that you can spread it easily with a spatula
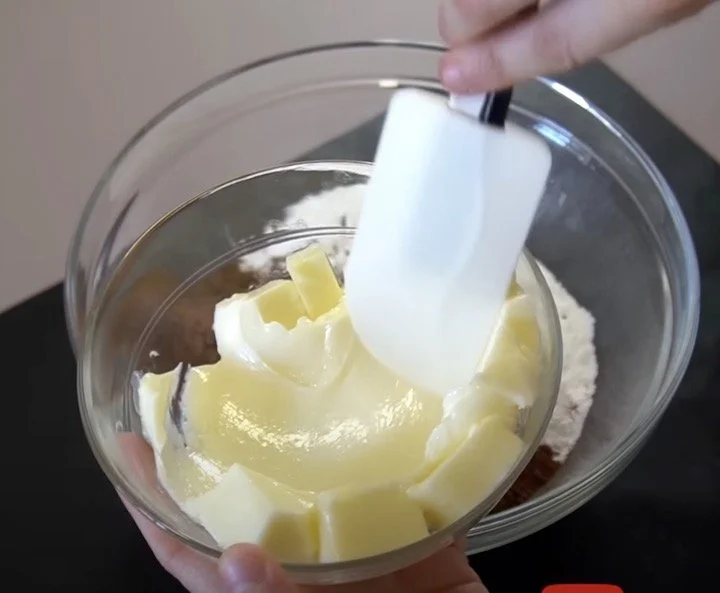
Notice how soft the butter is—easily spreadable with a spatula
Add the softened butter to the dry ingredients

Heat the cream. I like to do this in the microwave. I use repeated 30 second blasts, stirring in between, until it’s hot. If you prefer, you can heat the cream in a small pan over a medium heat.
You don’t want the cream to boil, but you do want it to be hot so that it will melt the butter and bloom the cocoa powder. (See above for how blooming works). Pour the hot cream over the other ingredients.

Mix until well combined. The frosting will look lose at this stage.

Cover with plastic wrap and refrigerate for 45 minutes. When it’s cold, the frosting will be much more solid and have kind of dull look to it.
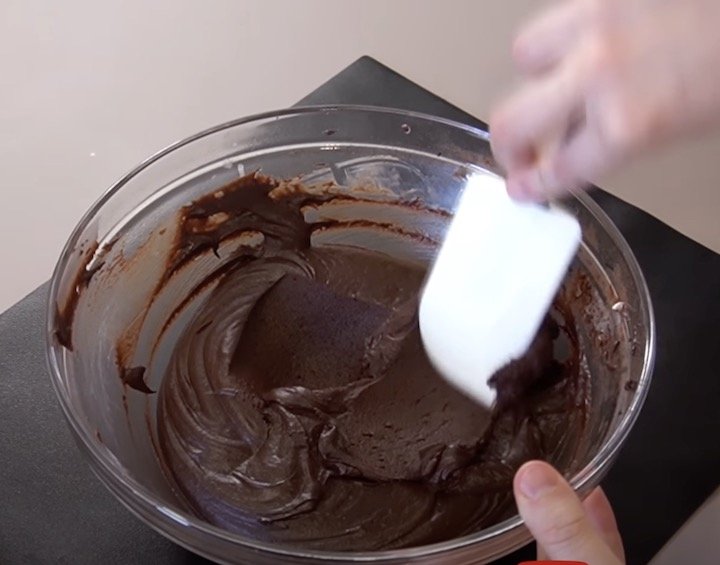
When the frosting has chilled down in the fridge, it will look dull and be quite solid
When you’re ready to frost the cake, take the frosting out of the fridge, and whip it using electric beaters. This will make the frosting look shiny, delicious and nicely spreadable.

Whipping the chilled frosting just before we’re ready to frost the cake.
Assembling and frosting the cake
Once the frosting is whisked it will have the perfect spreadable texture for frosting the cake.

The finished Devil’s Food Cake frosting should have a soft, spreadable texture
Assemble the cake by adding a good amount of frosting on top of the first layer.

Assembling the cake
Begin frosting the assembled cake on the sides.

Start frosting the cake on the sides
Finish frosting the cake. There’s no need to be too precise. Devil’s Food Cake should have a rustic style to it, not precise, sharp edges.

Finish frosting your Devil’s Food Cake with a few swirls to give a rustic look
Serve
To serve, cut into slices and watch everyone devour this cake in seconds!
Making Ahead
You can store this cake in the fridge for up to 5 days. Make sure to take it out of the fridge at least 30 minutes to an hour before you want to serve it. Personally, I keep this cake at room temperature for 1 or 2 days.
Either way, you must keep the cake covered to stop it drying out. A good trick for covering frosted cakes is to place a large upside down pot over them.


Hi! I’m Emma Fontanella. Here you’ll find trusted, tested recipes to satisfy your baking addiction and carb cravings. Learn more…
Tried one of my recipes? Please let me know on Instagram (@emmafontanella) or TikTok (@emma.fontanella)! Hashtag #emmafontanella
Search for another recipe…