
Ultimate No Bake Cheese Cake Recipe |
Only 5 Ingredients

Emma Fontanella’s Ultimate 5-Ingredient No Bake Cheesecake
About Ultimate No Bake Cheesecake Recipe
No-bake cheesecake might be the ultimate spring or summer time dessert. This recipe really delivers what I think we all want in a no-bake cheesecake—an incredible light, creamy texture along with a flavour that balances tangy and sweet perfectly. It makes a refreshing end to a meal, or to have by itself anytime you need a to satisfy a cheesecake craving!
The recipe calls for just a handful of good ingredients to deliver a cheesecake that’s perfectly set. (There is no gelatin or any eggs in the recipe).
If you like this cheesecake recipe, you’ll find other great cheesecake recipes like Classic New York Cheesecake and No-Bake Mini Cheesecakes in my new cookbook, Simple Pleasures.

A slice of the no-bake cheesecake. Note the creamy texture.
I’m going to show you two techniques. The first is what I call the “dump it all in” method, which is the fastest way to make it. With this method, you simply dump all the ingredients together and mix. That method does require some skill because you have to work quickly—like a chef.
The second method is my completely foolproof method. This technique is great for beginners can use—follow this, and you can be confident of achieving perfect results..
Lastly, just in case things do go wrong, I’m also going to show you how to save a runny cheesecake filling. So nothing ever has to waste.
What is no-bake cheesecake filling made of?

The key ingredients for a no-bake cheesecake filling. From left to right: heavy cream, Philadelphia cream cheese, and fine sugar.
The key to a great no-bake cheesecake filling is the balance of sweet and tangy flavor, along with a smooth, light and creamy texture. There are a several ways to achieve this by using different combinations of ingredients.
Because one of the main ideas of no-bake cheesecake is simplicity, though, I believe in using the simplest combination of ingredients that can achieve this.
All you need to achieve an incredible result is: a tangy cream cheese (I recommend Philadelphia, but you can experiment with other brands to see what works for you); heavy cream; fine sugar (fine sugar is best because it dissolves quickly); and vanilla extract.
Can I substitute fine sugar with powdered sugar?
Yes, you can substitute the fine sugar in the recipe with powdered sugar. However, because powdered sugar contains corn starch, it will be a little less sweet than if you were using fine sugar. To maintain the same level of sweetness for this recipe, add an extra 2 tablespoons of powdered sugar.
Is baked cheesecake better than no-bake?
There’s no such thing as better or worse here. What you need to know is that baked cheesecakes and no-bake cheesecakes are quite different. If you’re looking for a dense, rich cheesecake, then go for a baked cheesecake. If, on the other hand, you’re looking for a light and refreshing cheesecake, then go for a no-bake cheesecake. Both are delicious.
Why is my no-bake cheesecake not set?

Sometimes, even when you think you’ve done everything right, no-bake cheesecake fillings can go runny.
The are three main reasons why your no-bake cheesecake might not set. The first is that your ingredients are not cold enough. When a no-bake cheesecake recipe calls for heavy cream, it’s relying on you being able whip up the cream. This will make the cheesecake firm in texture. However, heavy cream won’t whip up well unless it’s cold.
That means you need to ensure both the heavy cream and the cream cheese are fridge-cold. If your ingredients are too warm, you’ll end up with a soupy mixture that will never set, no matter how long you leave it in the fridge.
The second reason your cheesecake won’t set can come down to the brand of cream cheese you use. Different manufacturers use different ingredients in their products, and not all work well in no-bake cheesecakes. I recommend Philadelphia cream cheese, but feel free to experiment with other brands to find what works for you.
The final reason why your cheesecake mixture can go runny can be cause by sugar causing the filling mixture to liquify before it has a chance to stabilize. See Method 2 in the Instructions - “The Foolproof Method” for a way to ensure this doesn’t happen.
How do you thicken a runny no-bake cheesecake filling?

Sometimes, a no-bake cheesecake filling can turn “soupy” in texture. Don’t worry, we can rescue it!
If your cheesecake filling goes soupy in texture, don’t worry—you can fix it! Just add a little gelatin to the mix, and it will set up in the fridge just fine. The trick is to use just enough gelatin so you don’t end up with a jello texture for your cheesecake.
For this recipe, use 2½ teaspoons (7 grams) of powdered gelatin (that’s one sachet of Knox unfavored gelatin, which is what I recommend), and add 4 tablespoons of heavy cream. Microwave to dissolve the gelatin.
Then, while mixing your “soupy” cheesecake mixture” continuously, pour in the gelatin mixture in a slow stream. Pour the mixture into your cheesecake pan with the prepared cookie base and refrigerate.

Adding the gelatin cream mixture to the runny base, while mixing continuously.
Please note that if you want to substitute the gelatin with agar agar, it’s not a 1:1 substitution by volume. You’ll want to use around 1 teaspoon of agar agar. Make sure that the agar disperses evenly and is heated to the right temperature in the cream. (You might want to disperse it in a little water before mixing into the cream).
Please also remember that agar sets very quickly when it goes cold, so please be sure to mix the cold cream vigorously as you add the hot agar/cream mixture, otherwise you risk ending up with blobs of agar/cream gel in your cheesecake filling.
Why is my cheesecake not creamy?
It’s the fat content in the cream cheese and the heavy cream that gives no-bake cheese cake its creamy texture. If your cheese cake doesn’t taste creamy, or if it’s gone runny despite using fridge-cold ingredients, the most likely reason is that you used low fat ingredients. Use full fat cream cheese (ideally 33% fat or higher) and heavy cream (around 37% fat).
Why does my cheesecake taste cheesy?
When cheesecake tastes cheesy it’s because you didn’t use enough sugar. Don’t cut the amount of sugar in cheesecake recipes! I know it can be tempting to cut the amount of sugar in dessert recipes, but a good no-bake cheesecake is all about the balance between sweet and tangy. No one wants a cheesecake that tastes cheesy!
How to make an easy 2-ingredient strawberry sauce for cheesecake
Take 10oz (300g) strawberries, ¾ cup (150g) white granulated sugar, and 1 tablespoon of water. Pulse in a food processor until everything is mixed together and there are no more visible pieces of strawberry and the texture is smooth. Reduce the sauce in a pan over medium heat until it has the consistency you want.
EQUIPMENT
Use an 8 inch (20cm) springform pan, or a 7 inch (18cm) pan for a taller cheesecake.
INGREDIENTS
5oz (150g) cookies (I like to use either Graham crackers or digestive biscuirs)
5½ tbsp (80g) unsalted butter
18oz (500g) full fat cream cheese, fridge cold
1 cup (250g) heavy cream, fridge cold (I recommend Philadelphia)
½ cup (100g) fine white sugar
2 tsp vanilla extract
INSTRUCTIONS
Make The Cheesecake Base
Let’s start by making the base. It’s the same for both of the methods for making cheesecake that I’m showing you here.
Prepare the pan
There’s a good trick when you’re making any type of cheesecake, whether it’s no-bake or baked. You want to mount the base of the pan upside down. That way, it will be easy to slide the cheesecake off the base.

Flipping the base of the pan upside down.
If you assemble the pan in the usual way, the ridge on the base will make it hard for you to transfer the cheesecake onto a plate because your spatula will get stuck on the ridge.
Once the base is secure, butter the pan and line the bottom with parchment paper.
Make the crushed cookie / butter cheesecake base

Preparing the cheesecake base.
Put the cookies you want to use – either Graham crackers or digestive biscuits -- in a zip-top bag, and bash them to a fine texture using a rolling pin. Or you can use a food processor.
(At this stage, if you want to, you can add some mix-ins to the crust to create extra flavor and interest. If you want to add things like chocolate chips or chopped nuts, use about 4 tablespoons. If you want to add say citrus zest, use the zest of one fruit. Adding mix-ins is completely optional though.)
Mix the cookie crumbs with melted butter, until well combined. Then press the mixture down firmly in the pan to form the cheesecake crust. I like to use the base of a small drinking glass to do this, but the back of a spoon also works.

Pressing down the cheesecake base using a drinking glass.
Put the pan with the prepared base in the fridge to allow the base to set up.
Some secrets to success in making no-bake cheesecake filling
The first is to use cold cream cheese and cold heavy cream. Many people will tell you to use room temperature cream cheese for no bake cheesecake.
While that works for some recipes, in many cases, it’s a recipe for disaster! Room temperature cream cheese will immediately warm up the heavy cream when we add it. That’s a problem because, unless it’s cold, heavy cream can be difficult or impossible to whip. So, using room temperature cream cheese often causes you to end up with a runny cheesecake filling.
A runny cheesecake batter is fine for baked cheesecake because the eggs in the mix set the filling as it bakes. But for no bake cheesecake we’re relying completely on whipping cold ingredients to set the filling.
The second thing to know is not all brands of cream cheese are created equal. Some brands contain more water than others. That extra water lowers the overall fat content of the mixture which can prevent it from whipping.
I recommend sticking to good old full fat Philadelphia cream cheese. However, if you do want to use other brands, feel free to experiment to find ones that work.
Now that you have some background knowledge on no-bake cheesecake, you’re ready to make the filling use either of the two methods I’ve given you below.
Filling Method 1 - The “Dump It All In” Chef Technique
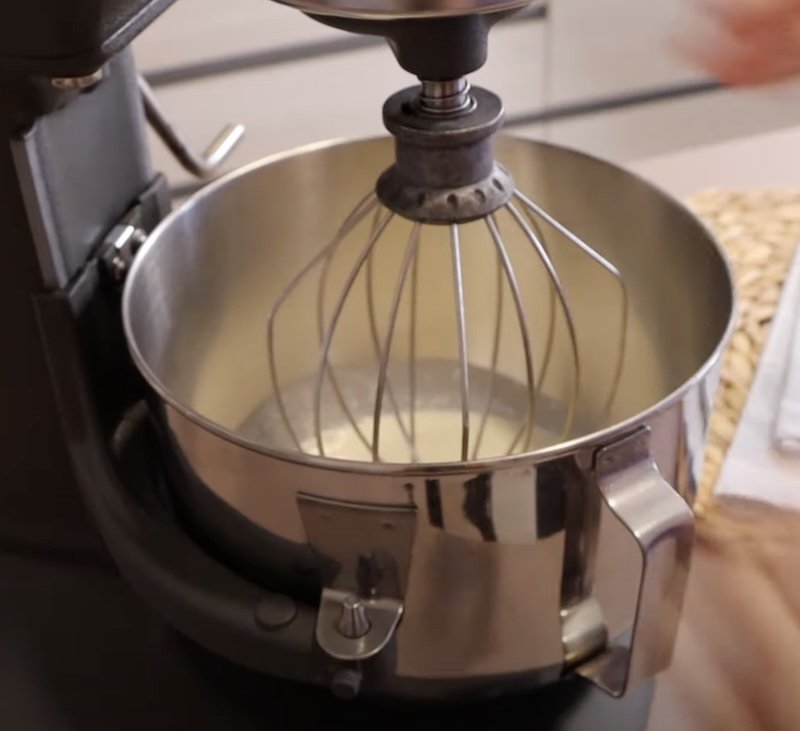
Whipping the ingredients for the filling using a stand mixer with a balloon whisk attachment. This is the fastest way to mix the ingredients.
Let’s start with the “dump” method for the filling. It’s the method I’ve used in restaurants and bakeries for years. You must be precise about how you follow the instructions here, but if you’re confident in the kitchen, you can easily do this!
It’s so simple, you’re not going to believe it! To a large mixing bowl, add the cream cheese, the heavy cream, and the fine sugar. The cream cheese and the heavy cream must be straight from the fridge for the reasons I mentioned before, and you must work quickly... like a chef!
I recommend using a stand mixer for this because it’s the fastest way to mix the ingredients. Cover the mixer with a tea towel so that the heavy cream doesn’t splatter everywhere. Mix on medium high speed until whipped. This should only take a couple of minutes, maximum. If you’ve done it right, the mixture will be quite stiff and perfect for your cheesecake filling.
This is what the texture of the filling should look like when whipped correctly. As you can see, it’s firm enough to use right away.
Now, this all sounds easy, and it is, However, if you don’t work quickly, the mixture can end up runny and the cheesecake just won’t set up at all, no matter how long you leave it in the fridge. So, if you’re a beginner, or you just can’t work quickly, I’m going to show you a method that’s completely fool proof.
Filling Method 2 - The Foolproof Method

Breaking down the cream cheese before adding the heaving cream. This ensures you won’t have any lumps in your finished cheesecake filling.
As with the dump method, everything needs to be cold. Start by adding just the cream cheese to the bowl. Whip the cream cheese by itself for 10 seconds. This is a great trick because it makes it easy to incorporate the cream cheese into the heavy cream.
If you’ve ever had lumpy cheesecake mix, this solves that problem completely. Lumpy cheesecake mix is caused by clumps of cream cheese. Doing it this way, you’ll smooth out any lumps before you get started trying to incorporate the cream.
Add the cold heavy cream and whip up the mixture until medium peaks form. Once the mixture has reached medium peaks, add the fine sugar.

The finished cheesecake filling when prepared correctly. As you can see, the texture is stiff enough to use for the filling.
We add the sugar towards the end once the cream cheese / heavy cream mixture has stabilized. When you add the sugar at the beginning, the sugar molecules can pull water out of the cream cheese, making the mixture liquify and impossible to whip before you even start.
Note that this isn’t a problem in Method 1 above, “The “Dump It All In” Chef Technique” because you’re working so quickly, the mixture stabilizes before it has a chance to liquify.
Assemble & Serve The Cheesecake
Add the filling to the base

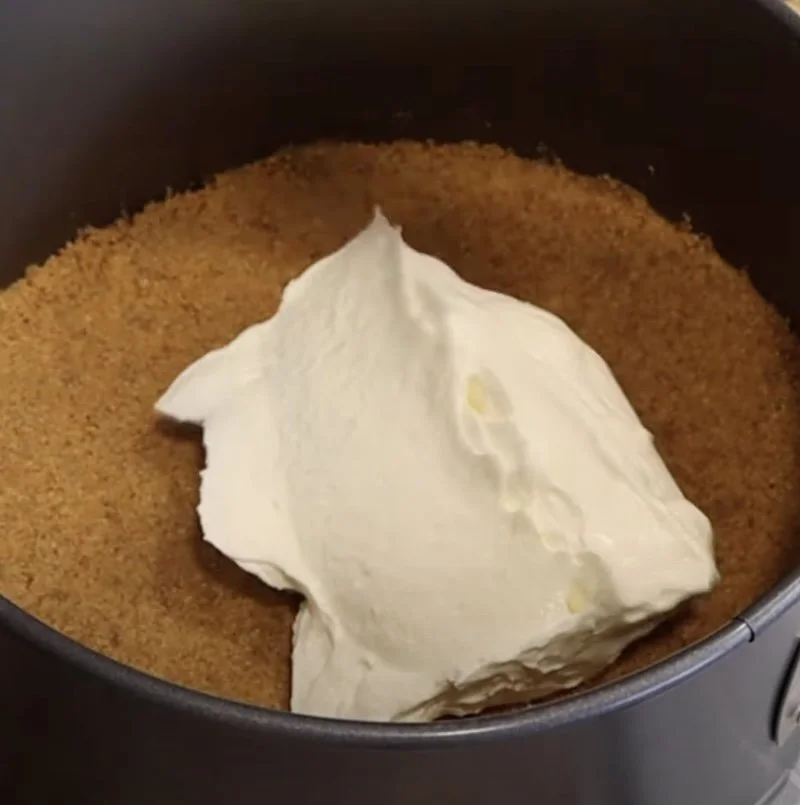
Adding the filling to the prepared base. Add it in two or three stages, smoothing at each stage to ensure there are no holes in the final cheesecake.
Add the filling to your prepared cheesecake base. I recommend doing this in two or three batches, smoothing out the filling after each addition. This will ensure you don’t have any air holes in your cheesecake.
Cover and chill

Covering the cheesecake with plastic wrap before chilling.
Cover the pan with plastic wrap or foil. Then chill it down in the fridge for at least 8 hours, or ideally overnight.
To Serve

The finished no-bake cheesecake, cut into slices for serving.
Release the cheesecake from the pan. Slide it off the base onto a serving plate. (The parchment paper will allow the cheesecake slide off cleanly). Cut into slices and serve.
If you like, you can make a quick strawberry sauce to serve with the cheesecake. See the section above called, “How to make an easy 2-ingredient strawberry sauce for cheesecake”.
Make Ahead
Store the no-bake cheesecake in the fridge until read to serve.
Watch the video for more tips


Hi! I’m Emma Fontanella. Here you’ll find trusted, tested recipes to satisfy your baking addiction and carb cravings. Learn more…
Tried one of my recipes? Please let me know on Instagram (@emmafontanella) or TikTok (@emma.fontanella)! Hashtag #emmafontanella
Search for another recipe…